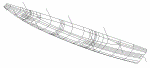
After building and finishing the two
floats, now it's the turn for
the main hull. Please click on the images to open an extensive photo gallery of
the various stages in the building process.
Beam Bulkheads:
Before setting up the main hull, and while still having the room, I first made the beam bulkheads as these
requires a special construction for the folding mechanism. A rather big
laminating job with vacuum bagging. The first attempt is a bit disappointing,
with epoxy everywhere, not only on the part, but also everywhere else. Because
of a too sharp edge on the molded flange I pulled a big hole in the underside of
the vacuum bag. Getting a wet vacuum bag airtight again is quite a job. While
the resin clock continued it ended in a big mess. I left the workshop in my
underpants, and with epoxy in my hair (it's shorter now). Now I know again why I dislike vacuum bagging and like the vacuum
infusion so much. However, vacuum
bagging is the way to go for this complicated laminating job. Or just
hand-lay-up. But once used to the quality by a vacuum treatment, it's hard to be
content with anything less. I am very comfortable using it.
At the end, after eight vacuum bags, it's becoming
more of a routine with less mess and better vacuum bags. Practice, practice
..........
Setup first main hull half: This is one of these
memorable stages. Not only the "real boatbuilding" work, at
least the fun part has just begun in this stage, but more memorable is
the fact that the hull fits in my small workshop as I had thought to myself.
It's a close fitting and a relief at the same time. I've started with the
starboard side of the main hull as the geometry of this hull half fits better
in my workshop.
I knew before that the height of the workshop is not enough to
join the two main hull halves, so the planning is to make the second hull half
and the joining to a complete boat in a bigger workshop somewhere else (still to
find that place). This will be temporary and the completing of the boat will be
again in my garage.
Layup dry laminate and infusion. The bag was perfect, the vacuum was
almost perfect, however after the vacuum was on, I discovered I had a batch of
wrong tubes. They look the same as I've had before, but these ones were pressed
together and useless for the infusion job. Very disappointing. As infusion was
planned for the next day (Monday, and with an announcement on the F-boat forum
for a live show on the webcam)) a quick ride to fellow builder Bert Hofman
brought the solution as he had enough tubes to help me out. It was late Sunday
evening (or better said Monday morning very early) when all tubes were replaced
by the good ones.
Below the video (14,6Mb) and at the right the moving animation (1 Mb) of the
infusion simulation.
Beam bulkheads and folding system setup : Making and
positioning the carbon lower folding strut anchors turned out to be a tough job.
I've had some worries because they are such an important structural part of the
boat. The first two attempts were a bit disappointing but finally I developed
the right method to wrap the carbon around the anchors blanks.
The building project until now was mainly a matter of forming foam into hulls,
laminating (ok, better said infusing) and gluing bulkheads into position. It
gave me the feeling of putting a boat together, but not constructing something.
However, mounting the beam bulkheads and lower hull strut anchors with the
accompanying reinforcements is much different from that and gave me the feeling
of a constructing work. I was already impressed by the design drawings and
engineering quality of Ian Farrier and the way these elements are being
constructed is more than an confirmation of that.
Daggerboard case:
The daggerboard case is made of marine plywood and I discovered the hard way
(at least after two failed vacuum bags) that the porosity of the plywood makes
it impossible to make an airtight seal with sealant tape onto the wood.
Something to remember for all wood builders. The vacuum infusion was done with
two bags, one for the infusion and one for the vacuum integrity. A stopgap and
not something to copy !
Bulkheads
and cockpit area. The finishing of this first main hull half with all the
structural bulkheads and the making of the cockpit coaming, emergency escape
hatch and the safety compartment.
On the left a video of the
infusion of the escape hatch coaming.
Unmolding
the starboard main hull half: This went on quite straight forward.
Most of the work was cleaning up the mess and to find a new place for
all the stuff that I still don't want to throw away. The half hull is
remarkable stiff and instead of starting the other hull half I decided
to start with some more interior work as access to the hull is great in
this stage. However, life would be easier if I knew what do with
the interior ..... decisions, decisions .........
Interior layout: I finally decided about the layout of the interior. The
biggest change compared to the
standard aft cabin layout is the galley on
starboard instead of port. Main reason for this is that I still like "the
office" on board, which lead to a rather conventional layout, in particular in
combination with a quarter berth. Because of the galley on starboard the settee
in front of this is now shorter, but still useable as a (sea) bunk with the feet
through an opening in the cabin bulkhead. Above that the diesel oven is situated. Galley top
can be extended by folding down the backside of the settee back. The dinette is now two
meters wide and can be converted into a large spare double bunk. Also the shower
is a little wider. Without rebuilding the interior this can accommodate six (with
table down eight and with spare bunks in the floats even ten) Cooking is on a
ceramic diesel stove and in addition to this a fully gimbaled single
cylinder burner, positioned in a dedicated housing and well ventilated outside.
Of course the interior question is a matter of personal taste. I think this is a
good sea going layout and at least for now this design gives me some peace of
mind.
Systems: Click on the colored system items in the layout
drawing below to open a principle sketch about the subject. I will add more as
progress allows.